Best Out of Waste: Cardboard Parking Garage
School vacations are almost here — and if you’re wondering how to keep your little ones busy (and off screens for a bit!), here’s a fun idea. Grab those empty cardboard boxes lying around and turn them into a mini parking lot for toy cars. It’s easy, creative, and a great way to show kids how recycling can be fun. Plus, they’ll love having a brand‑new play space they built themselves! (It may be a small but important contribution)
Step 1: Gather Your Materials
You don’t need anything fancy. Just collect:
- Waste cardboard (old boxes work perfectly)
- 4 cardboard tubes (kitchen towel rolls/book cover rolls/toilet paper rolls)
- Scissors or a paper cutter (adult supervision needed)
- Glue or tape
- Masking Tape (optional)
- Glue Gun (optional)
- Sketch pens, crayons, or paint for decoration
- Toy cars
Step 2: Cut and Shape
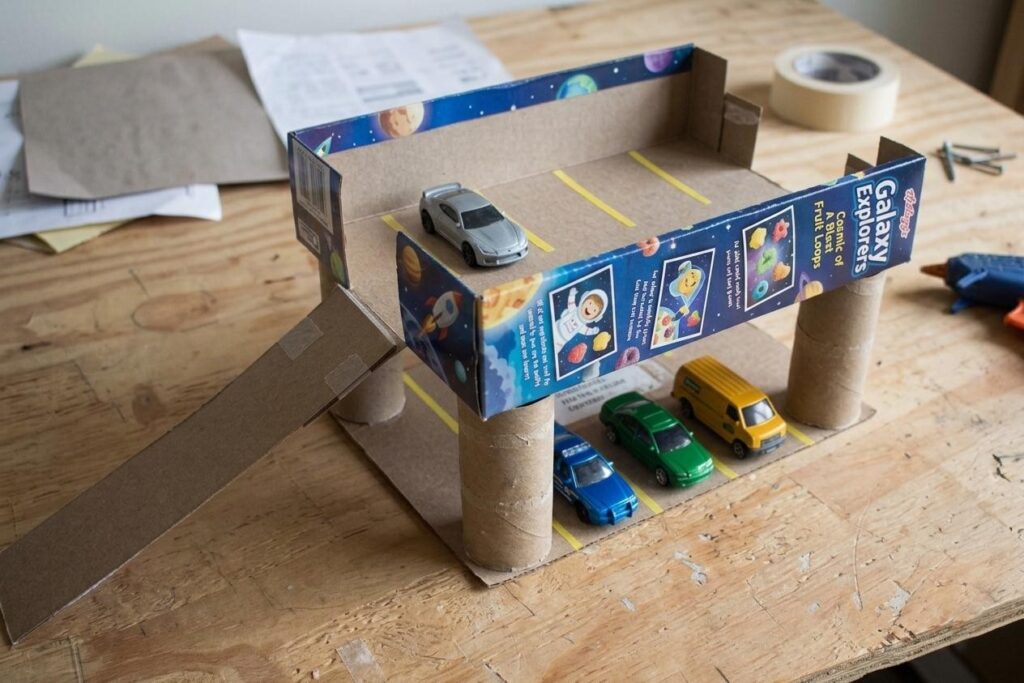
1. Make the Base Cut a flat piece of cardboard. This will be the ground floor.
2. Add Pillars Glue four cardboard tubes upright at the corners. These will hold the upper floor. So, it needs to be strong.
3. Create the Upper Floor Place a waste crockery box/old game box or flat cardboard piece on top of the pillars. Secure with glue/tape.
4. Build the Ramp Cut a strip of cardboard and attach it as a ramp from the upper floor to the lower floor.
Step 3: Decorate Together
5. Draw Parking Lines Use markers or paint to make yellow/white parking slots. Yellow masking tape or washi tape can also be used.
You may add arrows for entry/exit.
PRO-TIP– It’s a good idea to decorate before assembling.
Step 4: Playtime
6. Park toy cars on both levels and enjoy your handmade garage.
This project is a lovely reminder that the best toys don’t always come from a store — sometimes they’re made at home, with a little creativity and a lot of fun…
A perfect parent -child bonding activity!